Considering, measuring and controlling the lighting when filming any kind of video will help ensure you record the best quality visuals possible. Here I write a brief overview of the basic concept of using light which, with your camera selected to manual mode, can help you improve the visual quality of your video recordings.
Camera settings and exposure
Our eyes naturally adjust for exposure and the different colour temperature of various light sources. Video camera sensors are not so intelligent and generally work in two kinds of ways, automatic exposure or manual exposure. When a camera uses automatic exposure mode, the camera sensor works out some sort of average to expose the field of view and the subject as it sees fit.
Depending on many factors, this can result in either excellent or sometimes badly exposed looking video. When a camera is set to manual exposure mode, the exposure settings and colour temperature (measured in Kelvin) needs to be correctly set on the camera. Filming in manual mode and setting these exposure camera settings gives you full control over the exposure of the subject and allows you to create perfect visual images.
By always filming in ‘manual mode’ you will have creative control over your filming, gain a greater understanding of the craft skills involved and you will be able to record consistently improved quality images. In manual mode, you set the camera correctly for exposures by using a combination of shutter speed (exposure speed – examples 1/50), aperture (F-stop – example f.5.6) and ISO (or film speed – example ISO 800).
Colour temperatures
In addition to the cameras main exposure settings, you also need to tell the camera what colour or colour temperature the light is. Colour temperature is a characteristic of visible light. Our eye perceives many different colour temperatures as a kind of white light, but a video camera records the light temperature, the difference is important.
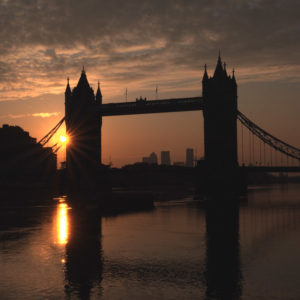
Warm orangy colours like an old tungsten incandescent filament lamp have a Kelvin temperature of 2700 Kelvin. A halogen tungsten spotlight might be 3200K. A clear blue sky sunny day might mean the Kelvin temperature outside is 5500K. A flat white bright sunny day will mean the actual Kelvin temperature outside is higher.
Any professional person filming with a camera in ‘manual mode’ would ideally either carry out a camera white balance test or use a light meter to measure the light on the subject to be filmed so that the camera settings can then be set correctly. By adjusting the camera correctly, the exposed image looks the right colour and is correctly exposed to suit the subject and context.
Lighting colour temperatures
If you then want to add an artificial light source to help illuminate your subject to achieve a more aesthetically pleasing result, then that light would also need to be adjusted to the appropriate Kelvin temperature so that it illuminates the subject correctly. Some light units mainly used for filming video come with one fixed pre-determined Kelvin temperature. The Kelvin colour of any light can be adjusted, if required, to output a different Kelvin light colour or temperature by adding the correct coloured gels between the light and the subject (usually on the actual light).
Bi-colour lights
Another type of light used for lighting and video filming are termed ‘bi-colour’. Bi-colour lights allow their Kelvin temperature output to be varied and set to different temperatures of white light without the use of coloured gels. These lights may have a Kelvin output that can range from something like 2700K (redder) to 6500K or higher (bluer). Bi-colour lights are very beneficial when filming as they adjustable across a range of white light colour temperatures ranging from tungsten looking red whites to bright sunny looking blue-whites. Bi-colour lights enable you to set the lighting temperature at the correct colour temperature to match any filming situation or any ambient light temperature.
Using a light meter
The actual Kelvin temperature of the light that’s hitting your subject can be affected by many factors. These can include; how bright or dim your light unit is set; the distance from the light to the subject and the effect of any ambient light in the environment. For example, a ceiling light turned on in the room, or the light coming through a window, or any other source of light will affect the ambient colour temperature.
Anything that’s placed in the path of the light, like a softbox or any kind of diffusers might also affect the colour temperature hitting the subject. So that you know precisely what Kelvin temperature is illuminating your subject you need to measure the light hitting the subject. Measuring the light on the subject is the most accurate way of knowing how to set your camera exposure correctly when filming in manual mode.
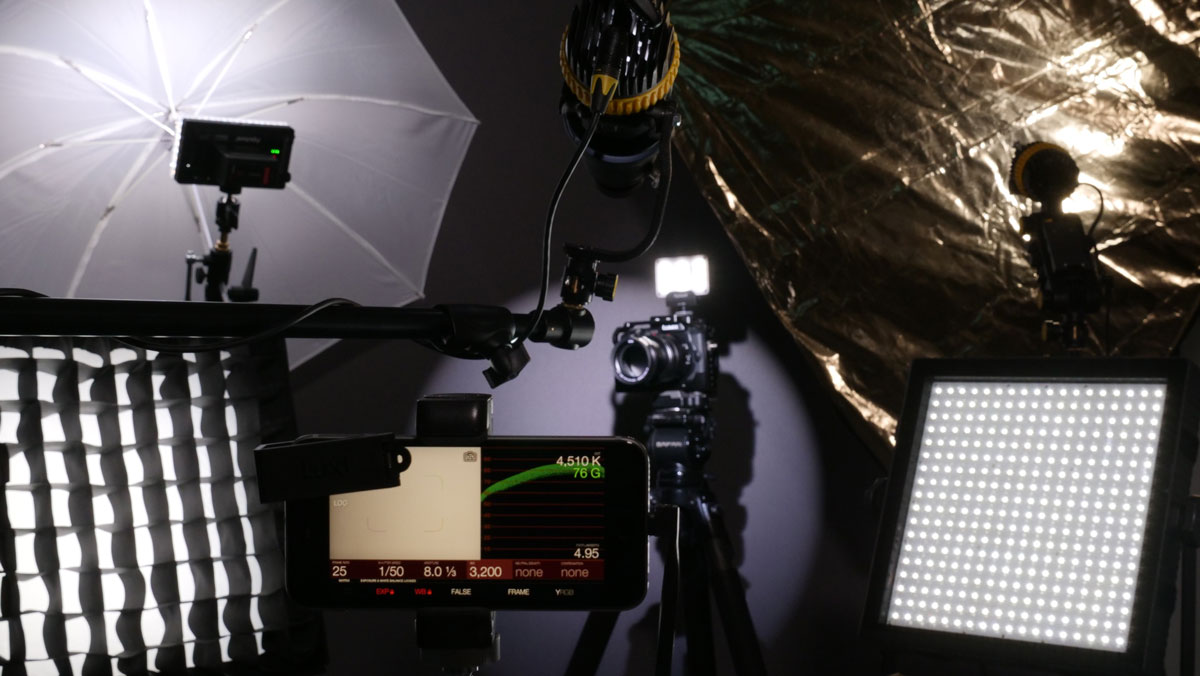
Professional light meters are a very costly and unrealistic option when you start filming. An affordable solution is the Cine Meter II phone app which is a great light meter you can install on your smartphone. When used with a Luxi adaptor and then a suitably calibrated Cine Meter II, you will then be able to measure an accurate Kelvin reading on your subject in most circumstances.
Camera sensitivity
Another factor in determining if you need any additional light is the actual measuring sensor inside your camera. Some camera sensors can film video in very low lighting conditions and still film a very high-quality low noise image. For these sensitive cameras, you can adjust the ISO to a much higher level. When used in conjunction with a fast lens (with a wide-open aperture) much darker environments van be captured without requiring additional lighting. These cameras can negate the use of any artificial lighting if that is the look and style needed for the production you are filming. For example, my Lumix GH5S allows me to film at ISO3000+ and when used in conjunction with something like a Voigtlander 25mm f0.95 I have filmed beautiful atmospheric shots in darker environments without additional lighting.
Hard lights vs soft lights
There are two main categories of light, hard light and soft light. On a clear blue sky day outside with full sun, the shadows of any subject will have a hard edge. Any spotlight type lights like the full sun that create a hard edge in their native form are termed hard lights. On a bright day outside with a blanket of full cloud, you might not see any shadows as the cloud has diffused the sun and so the sun then becomes a soft light.
If we go back to our spotlight with hard shadows and place some opaque diffusion material like a filter over the front of the light, then the edge of the subject shadows will change to a softer edge. Adding diffusion in front of hard light (hard-edged shadows) makes creates a soft light (soft edge shadows).
Lots of different types of lights are available, but the key difference is the type of light they create and how it affects the shadows whether that be the subtle shadows in the features a face or any other subject. By experimenting with different kinds of light, you can drastically change the look of your subject.
Lighting your subject
So that you can correctly exposure your subject when filming in ‘manual mode’ you might want to ensure that you have consistent lighting for the duration of the filming. For example, when the clouds are moving fast across the sun, the Kelvin temperature (for the camera sensor) is continuously changing. If you are filming an interview indoors using the changing light coming through the window, then your colour temperature will also change continually. When filming in ‘manual mode,’ with one set temperature, this will mean you will see a change of colours and skin tone colours. To manage this particular situation, you could change the location to avoid the changing sunlight or cover the windows to block out the sun and then light your subject with artificial light.
Locations like film studios with no windows are used to enable full control of the lighting environment. If the weather outside is more consistent, i.e. clear blue sky or full of even cloud, then the Kelvin temperature will not change while the conditions remain the same. Ensuring that any lighting conditions stay the same for the duration of the scene or interview, for example, will help you deliver consistent looking results.
Why you need lights
The main benefit of taking lights to every shoot (that may need lighting) is that it gives you some level of control of the lighting situation. Of course, making the most of any available natural light, or sometimes the artificial light at your filming location may negate the use for artificial lights. The advantage of having your lighting kit is that you are not dependent on hiring lights or at the mercy of ever-changing natural daylight or the suitability of on-location artificial lights.
Some clients who book my filming services are unaware of the importance of lighting and are unlikely to provide detail of what lighting is provided or required unless requested. So when you have not been informed and are unable to ascertain the lighting conditions that are going to be presented to you at a filming location, it is always beneficial to have your lights and a choice of different types of lights whenever possible.
Sculpting light
From the beginning of my career as an independent freelance videographer, I’ve been building and developing my lighting techniques and learning more about lighting as I film a variety of subjects across a range of different environments. Consequently, I can see a continued improvement in the quality of my work with the correct use and manipulation of light. By experimenting with light and the position and number of different lights whilst filming in a range of different environments, you will be able to explore learning how to light and realise the visual benefits that proper lighting can bring to all your video creations. If you are looking to learn more then a great lighting reference book is Lighting for Television & Film by Gerald Millerson.
This page contains some affiliate links. I only add links to products which I either have personal experience of or know they will help my readers. If you click on one of the links and buy the product I may receive a very small commission (at no additional price to you). I don’t allow any adverts on my website. Please get in touch if you have any questions.