Working as a promotional trailer video editor I’m always editing a range of different content into various styles. In this blog post, I give a brief overview as to how you might approach a trailer edit.

Seconds to sell
Working as a promotional trailer video editor for the BBC (and also for Red Bee), I edited network presentation trailers to promote some of the nation’s favourite programmes. When editing great trailers, post-production editors need to be able to make the most of the short time provided to capture and engage the audience whilst also communicating the programmes’ or projects’ ideas. The duration of presentation of these trailers at the BBC usually averaged 30 seconds but could range from 10 seconds to 90 seconds.
Content to promote
Depending on the project, I would often work with a producer to deliver each programme’s promotional video. The producer might have filmed some specially shot material or commissioned some graphics or animations to be edited together. Another method of creating trailers is to use an edited mixture of vision clips and sound clips selected from the actual programme being trailed. Combining these clips with a music track and voiceover can enhance the programme’s appeal to a broader audience to maximize the viewing figures. Making the best possible trailer for any agreed duration means editing the content in a way that makes the most of every frame. For UK broadcast each second of the video consists of 25 separate frames.
How to start the edit
An excellent way to start editing a trailer is to start with the audio. A 30-second trailer may be required to end at 29 seconds and 15 frames so that it transmits cleanly on network television. It can be a good idea to edit down the selected music track to this 29s15f duration. Editing music down to such tight durations can be a challenge with some commercial music tracks. The trailer needs an appropriate start and a musical end. Once the music has been edited to the length required, then you can edit in any other known elements that have a fixed position. These might include an opening or end graphical board (possibly with ten frames early vision for the front or a freeze-frame at the end for network broadcast) or a powerful image from the programme.
Adding guide voiceover
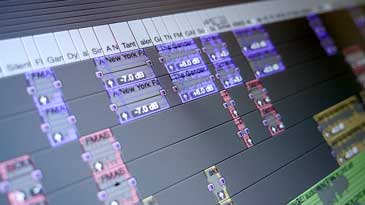
You may also wish to include a voiceover in the trail. It can be useful to record a guide voiceover and edit that into position. You can always edit in the final voiceover or perfect take at a later stage once the trailer is signed-off. When I was editing these trailers, I would usually edit together sync sound taken from the actual programme or film. Sometimes, the producer may have written a rough script and made a note of the time codes of all the relevant audio for use. At this early stage, I would focus on editing the sound so that it can fit the trailer duration. By laying down the video attached to that same audio will also help you build the vision edit as well. Once you have all the required sync edited into the timeline, you can see what duration the trailer is running. Editing out all the audio gaps in between words and phrases helps to tighten up the edit and can give you extra time to use. A promotional trailer video editor would be expected to tighten up any available audio gaps to create new opportunities.
Close your eyes and listen
With the body of the audio in place, you can play the trailer through to see if it’s working audio-wise and time-wise. At this stage, you may want to edit the audio so that it sounds more natural. Turning off the vision monitor or closing your eyes can help you focus on the actual sound rather than be distracted with the current visuals. Adjusting the levels of the music and audio so that you have the right sound balance can also help at this stage. Adding mixes to audio transitions can help smooth the joins and avoid any audio bumps.
Editing the vision
Once the audio is prepared, you can start to look at the vision. Hopefully, you will have edited in any video that was attached to the sound you have already used. In this case, you may now have a lot of vision jump-cuts from your work on the audio. You can now decide which of these visual elements to keep and which to paint over with a different shot or cutaway. You may choose to keep the more energetic facial visuals and edit in various visual shots from the programme at the previous or next edit. After editing in all your shots, you will hopefully have a trailer free from any jump cuts and which best reflects the programme or film you are looking to promote.
Colour grading and visual effects
Grading the pictures so that the promotional trailer fits the creative brief would usually be one of the last stages. Adding any textual elements or special effects can be done once the promo is nearly complete.
Promo video editor
For a promotional trailer video editor, there are many different ways to bring together a trailer; this summary is just one example. You start with what elements you have and you either work to a brief you have been given or create something yourself which in your opinion, works for the project, programme or film which requires promoting. If you would like any help with your promotional video editing please get in touch.
You might like to read these related articles to check out my video production blog for tips and advice.


