To help people film better on their devices, I have compiled this list of smartphone filming tips.
Smartphone filming case study
During a recent commission, these tips proved invaluable when I supported a group of 15 young actors collaborating for the first time on a scripted short film called Isolation. The producer sought my technical advice, which I delivered via Zoom meetings with all participants.
Most of the young actors had little or no filming experience. My goal was to help them meet the standards required for a multi-device online film production and to ensure I received the best possible footage in my role as short film editor on the project.
Mobile device film production
Before starting any joint filming project, liaise with your director and editor. Make sure you understand the specifications they need before you begin shooting. Smartphones and tablets have real benefits, but they also have limitations. Practising with your device beforehand helps you understand what results you can realistically achieve.
Preparing your device for filming
Start by exploring your device’s settings and back everything up to your computer of the cloud before you make any changes.
Next, check how much storage space you have available. Video files take up a lot of space quickly, so you want as much free storage as possible. Delete unused apps, or move old photos, music, and videos to a computer to free up room before you start.
Frame rate and resolution
For the Isolation project, I asked all the actors to record at 30 frames per second (FPS). When multiple people film for the same production, matching frame rates across all devices significantly improves the final result. Your production may require a different frame rate, 25fps is common, so always check with your editor or director first.
Set your resolution to suit the project too. For Isolation, I recommended 1920×1080 HD. Again, confirm the preferred resolution with your editor before you begin.
Use automatic white balance (AWB) if your device offers it. This lets the camera adjust automatically to changing or mixed lighting conditions.
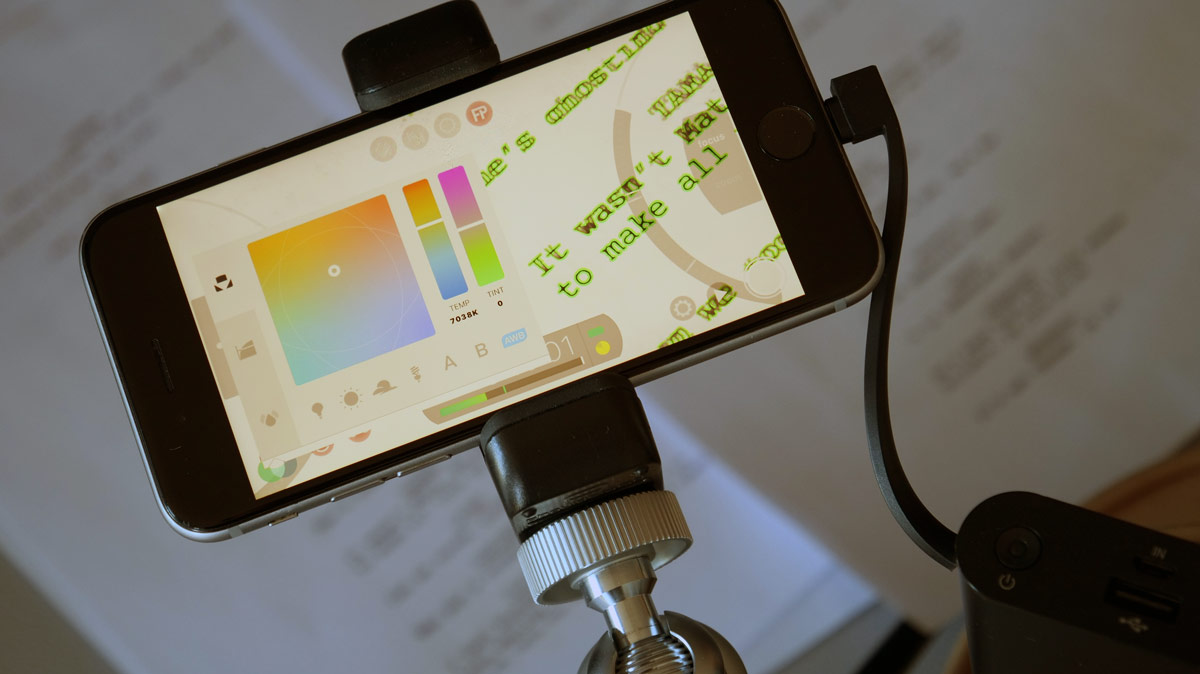
If you already have some filming experience and want more control, consider the FilmicPro app. It lets you set specific resolutions, frame rates, and precise colour temperature settings beyond what your default camera app allows.
Once you have adjusted your settings, shoot some test footage. Copy the files to a computer and watch them back on a larger screen. Check that the sound records clearly, the image stays in focus, and everything looks and sounds as good as your device can manage.
Smartphone filming tips: the full list
- Charge up and clear space. Start every filming session with a fully charged device and as much free storage as possible.
- Ask for help. Consider having someone assist you during filming; an extra pair of hands makes a real difference.
- Use aeroplane mode. Switch to aeroplane mode before you start so calls and alerts do not interrupt your recording.
- Clean your lens. Wipe the lens with a soft, clean cloth before every session.
- Think about lighting. Device cameras produce their best results in well-lit, low-contrast scenes. If filming indoors during the day, face the windows to take advantage of natural light. At night, make sure light falls directly on the subject’s face. Ceiling lights alone tend to produce unflattering results. Always shoot test footage to check your lighting before you commit.
- Frame your background carefully. Think about what appears around your subject in the frame. Avoid wearing black, very dark colours, or white on your upper body. These create high contrast and can cause exposure problems on some devices. Plain, neutral, or brighter colours tend to work best.
- Adjust your camera position. Small changes to height and angle can make a significant difference. Avoid positions where objects appear to grow out of someone’s head, or where the ceiling dominates the frame. Use a tripod, a stack of books, or a box to keep the camera level with your subject rather than pointing upward.
- Control your sound environment. Record in as quiet a space as possible. Make sure any actor speaks clearly toward the microphone, not mumbling or turning away from it.
- Keep the camera steady. Wobbly footage is distracting. Keep the phone as stable and smooth as possible, especially when moving.
- Consider the aspect ratio. Where will the end film be played? If you are making a 16:9 film in landscape mode. If you are filming only for social media, 9:16 might suit your project. Check with the editor.
Shooting for the edit
- Film multiple angles of the same scene. For dramatic sequences, shoot the same action from different camera angles. This gives the editor options and helps create a more polished final cut, but make sure the performance, actions, and emotions stay consistent between takes to maintain continuity.
- Give yourself breathing room. Start recording at least five seconds before the action or dialogue begins. Keep recording for a few seconds after it ends. The editor will trim these extra seconds during the cut.
- Shoot additional coverage. Depending on your production style, extra shots of faces, locations, reactions, and close-up details can all help tell the story. They also give the editor material to cover cuts between scenes.
- Record wild track. Record the ambient sound of your filming space with no other background noise. This is called wild track. It can prove very useful during sound editing and mixing.
- Review your test shots on a large screen. Watch your test footage on a monitor rather than your phone screen. If anything needs improving, i.e. lighting, focus, framing. Adjust and reshoot before you commit to the full session.
Filming different framed perspectives
When shooting each scene, consider varying your shots:
- Wide shot (WS) shows the subject within their full environment
- Mid-shot (MS) frames the upper body and face
- Close-up (CU) frames the face only, or a single action or reaction
- Big close-up (BCU) fine detail, such as fingers typing or a hand picking something up
- Point of view (POV) from the subject’s eye level, holding the camera directly in front of you
Movements and actions relevant to the story always make for compelling footage. Think carefully about camera height and angle relative to your subject. Small adjustments often make a big difference.
Media management
Once you have finished filming, organise your video files into clearly named folders on your computer or external storage. If you have a lot of footage, create subfolders for each scene or period of filming. Clear folder names help the editor locate the right files quickly.
It also helps to put together a simple Word document listing each video file, noting which takes are the best, what action or script line each contains, and any other useful context for the editor. Do not delete any footage, even fluffed takes or mistakes. Editors sometimes find uses for the unexpected.
I hope these smartphone filming tips prove as useful to you as they did to the actors on the Isolation project. Get in touch via my contact form if you have any questions. I am always happy to help.
You might enjoy reading some of my other related blog articles: