These Avid Media Composer project views will be familiar to professional film and broadcast professionals from all over the world. I’ve been an Avid Media Composer Editor since 1998 and have continued to edit on the platform since then. When you launch the Avid application and open an Avid project (on two monitor windows) you will see your project and source/record window views.
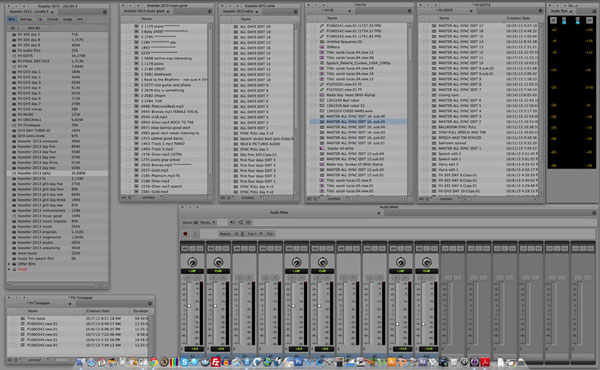
Avid project bin views
Avid Media Composer projects bins and audio mixer on my left hand NEC monitor. Only a few Avid ‘bins’ are visible in this view. All the bins used in the project can be seen listed in the top far left window. Avid allows you to customise the ‘bin’ view and select different parameters to show. As well as the master clip names for each media item you can see things like resolution, creation date and the storage hard drive the media is located on. An icon is displayed for each item of media. The audio mixer bottom right allows you to adjust the level of each track or a combination of tracks as you edit. The black window top right is the audio level meter which gives you a digital scale level as you play the audio in the timeline.

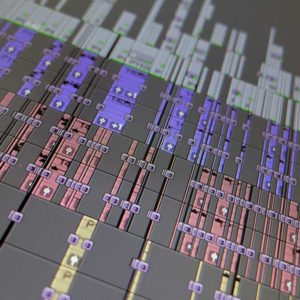
Avid project source and record windows
Avid project timeline with source and record windows on my right-hand side NEC monitor. This editing timeline illustrates the complex nature of a recent 11-minute film. It features an initial sync led storyline progressing into three separate music montages. The music montage segments can be clearly seen as having just music in timeline audio tracks. You can set-up many different views in Avid depending on what type of editing you are doing. For example, if you are colour grading or audio mixing you would want to see a different toolset for each task. I’ve checkerboarded the audio in this film, mostly using alternate tracks to help give smoother audio transitions. Most of the master video in on video layer ‘V1’. Titles and different video effects being built up over the V1 layer. An example of this can be seen with the opening and closing sequences where there is a more complex build-up of video effect layers. Avid also allows you to ‘nest’ effects inside each layer effectively building up a layer structure within each individual video layer. The Avid way of editing gives great flexibility which is why it’s the editing tool of choice for many film and broadcast professionals.
If you have any questions or would like advice on anything regarding your video production or post-production please do drop me a message. You might be interested to read these blog articles.