Here are some tips for filming outdoors. For producers or cameramen thinking ahead, these ideas and suggestions may help avoid problems when filming takes place on location.

11 tips for filming outdoors
I recently spent a day’s assignment working as a DOP on the filming of a crowdfunding campaign promotional video in a forest location. Planning in advance for my involvement in the project helped me ensure that my part in the filming went smoothly. Here are eleven tips for filming outdoors which I hope you find helpful.
1. Study the risk assessment form, production pack and script
The producer/director had sent all the cast and crew a copy of the risk assessment form, a crew letter and a call sheet with information about the shoot. Having read the production pack, I knew what to expect on the filming day and was aware of any potential risks and hazards whilst on location. Making sure you know the requirements ahead of filming gives you the time to obtain any extra kit that might be needed and also gives you the opportunity to clarify any points of concern with the producer, director, cast and crew.
2. Check what facilities will be available at the location.
It’s always great to get an understanding of any filming location so that you know what to expect. A recce of the location had been carried out so I was aware that there were toilets and refreshments available in the car park and also that we would not have any access to mains power. Therefore I made sure that I had ample spare fully charged batteries for the whole day. We would also be taking with us enough additional food and water for the day’s filming.
3. Check out the weather forecast
Knowing the forecast was for a very warm dry day I took some additional bottles of frozen water to supplement the food and drinks that were also being taken. The director had scheduled a second day for filming as a precaution as we would not be able to film if the first day was wet as the furry costumes had to be kept dry. So based on the forecast, we did not expect to be filming in the rain but, just in case, I also took a protective waterproof dust cover for the cameras.
Check other protection you might need such as a waterproof jacket and trousers, sun cream or insect repellent. If you are filming in Scotland you need might need a large wearable mesh to protect yourself from the summer midges! If it’s wet you are going to need a good cover for all your kit whilst filming. Make sure you consider the impact of the wind as well as the rain.
4. Spend time picking the right kit for the shoot
I always like to give myself ample time to pack the night before a shoot as it helps me to relax and to think of everything that I might need to include. For this particular shoot, I took several different microphones including two Sennheiser radio microphones and my Tascam digital audio recorder. I also packed two camera bodies and 6 batteries so that I knew I would be able to cover the filming for the day as well as a selection of lenses, data cards and variable neutral density filters.
When packing, do consider how much kit it is reasonable to take. Will you have to carry it any distance? Does it need to be lightweight? After a few hours packing up my kit I knew I had everything that I would need and, as we were filming in the forest, I also packed a multi-tool and a sharp hunters knife. All the kit you take will need protecting from the elements and dust. Data cards are best kept in a specially designed waterproof sealed case.
5. Arrange to give your cast and crew an early morning alarm call
I set my alarm for 0530 so that I could have a good breakfast and be ready for pick up at 0700. One of the cast overslept so we all had to wait an extra hour for them to arrive at the pick-up location which ended up affecting the whole day. In the meantime, we took the opportunity to have a pre-shoot production meeting whilst we waited. I made a mental note that, in future, it would be advisable to arrange alarm calls for all cast and crew if required.
6. Wear the right kit
Seeing as we were filming in a forest I wore my combat trousers, hiking shoes and a lightweight-filming waistcoat with lots of pockets. We had been informed that it was possible to get bitten by ticks and to get infected with Lyme disease so needed to protect my legs especially as the filming would entail laying down or sitting on the forest carpet.
The waistcoat with loads of pockets is really useful for carrying your radio mics, protected lenses, batteries and data cards and means you can have everything you may need on your person for filming. I also wore a large-brimmed hat, which can help protect your head from the sun but also doubles up as a handy shade for checking the LCD camera monitor in bright daylight.
7. Check the logistics of the location
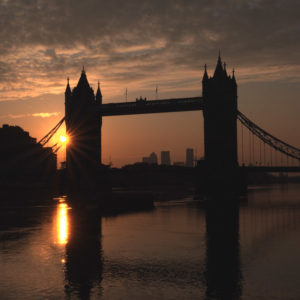
The filming location was a large wooded area, with a car park, just outside the west hand edge of the London M25. The producer/director had gained permission to film at the location from the park authority. I had been there previously so I knew the rough layout. I’ve downloaded a great app onto my phone called Sun Seeker which gives you helpful information about sunrise and sunset whilst also showing the sun’s position for any given location.
8. Plan your filming privacy if needed
We had three scenes to film, each at different locations, within walking distance from the car park. Each scene needed to be filmed with a variety of camera set-ups so we had to make sure we had enough time to film each scene. The first scene was based around a van in the car park. After being walked through the scene the cast got into costume and make-up which gave me and the other cameraman time to set up our camera kit and have a look at some camera set-ups with the director.
The first scene started to attract some interest from the public out walking their dogs but luckily this did not slow down the filming. If you need to film in private consider filming in a remote or private location as there is not much you can do if members of the public start filming your shoot as they have as much right to be in a public space as you do.
9. Have a flexible approach to the day
After filming all the different shots for the van sequence we headed out into the woods with all our kit. As well as the director there was two make-up artists, a stills photographer, three cast members, an art director, myself and another cameraman. We all had to carry all the kit and costumes ourselves. As we walked deeper into the woods I was pleased that I had only brought what I could carry which was a rucksack for my cameras and sound kit, a large grip bag and my fig rig.
I had been thinking about bringing some LED panel lights but it would have been too much to carry. It was great everyone helped each other during the day and had a flexible approach to their working day. Having a great team spirit really helps for filming days.
10. Managing the light
From this experience of filming in the forest, I learnt that you can lose the light of the sun very early in the day, once it drops below the height of the trees, especially noticeable in a very dense forest. This might be a couple of hours before sunset and so you lose what is known as the ‘golden hour’ for filming just before sunset. On this occasion, we finished filming for the day before we lost the light of the sun.
We had a large reflector in case we needed to illuminate faces which is a great help when the sun is shining. This is a great website for checking the suns precise position ahead of the shoot or for know where the sun is going to rise or set so that you are in the best position for the golden hours.
11. Managing the sound effects of a rural location
As we had a very small crew for this shoot so I was also recording the sound. To make sure I picked up the voices of the cast, I fitted each of them with a TRAM TR50 Lavalier microphone to the inside of their furry costumes with a radio link. Their furry costumes acted as great wind protection for the microphones.
The TRAM TR50 comes with a really sharp pointed attachment so was perfect for this occasion. I also secured another radio microphone on the set close to the casts seated position. I recorded both radio microphones onto my Tascam DR-60, which ensured I could record useable sounds of the cast even though there was also the background sound of a light breeze in amongst the trees.
Over the course of the day’s filming, I ensured that the microphones were located as close to the filming as possible. This included one scene where the microphone was worn close to the actor’s feet to pick up some great sounds of walking through the forest. I also used a Sennheiser direction gun microphone for recording external action sounds during the day. Having a range of microphones on filming days really helps to provide a variety of recordings to produce the best possible sound effects on the day for any given environment.
Learning more tips?
The more you practice filming in a variety of locations the more tips for filming outdoors you quickly learn. Do you have any tips for filming outdoors? Be great to hear any suggestions you may have.
You might find these related articles interesting or check out my video production blog for more tips and advice.