Filming a panel discussion with multiple camera angles and individual radio microphones gives you the flexibility to edit highlight videos and deliver multiple-length versions from a single shoot. This article covers how I approached a recent panel discussion filming project from planning through to final edit.
Panel debate video production
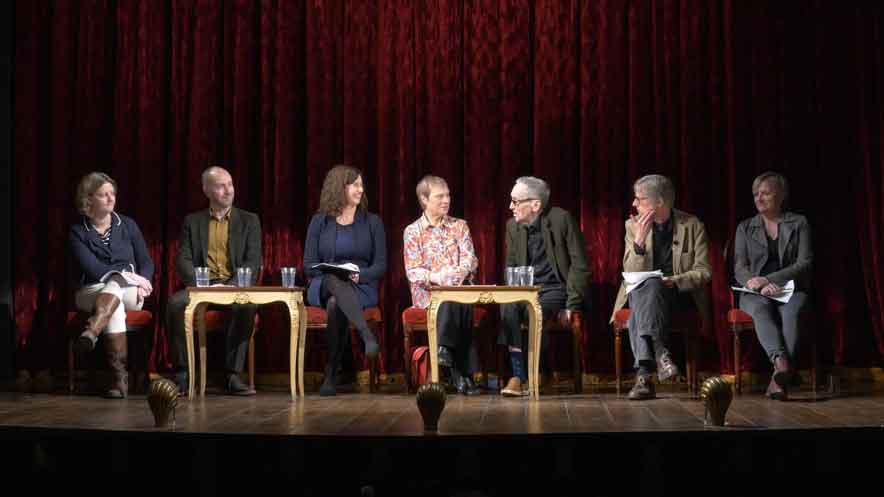
Digital Drama, a multimedia production company, commissioned me to film and edit a panel discussion for the Noel Coward Society. The subject was the play “Peace in our Time” by Noel Coward. Nine experts made up the panel, with Alison Ramsey, Producer at Digital Drama, chairing the discussion. Three actors who had performed in a recent radio production of the play also joined the event, performing scenes throughout the 60-minute debate. The debate took place one morning on the stage of the Noel Coward Theatre in front of an invited audience.
Location filming advice
After discussing the format with the producer, I recommended using two cameras. Two cameras offer significantly more flexibility when editing a panel discussion, as you can cut between angles and cover edits cleanly. I also suggested hiring a sound recordist to manage the audio. With six panellists and three actors performing at the side of the stage, sound management was critical. We planned to fit each participant with their own radio microphone to capture clean, individual audio from every contributor throughout the debate.
Lighting
Filming a panel discussion to a high standard requires careful thought about location, set design, and lighting. The Noel Coward Theatre kindly agreed to let us use some of their house lights to better illuminate the panellists during filming. One of their stage curtains provided an appropriate theatrical backdrop to the discussion.
Setting up the sound recording kit
Sound recordist Pietro Giordano brought his Sound Devices 664, a 12-channel, 16-track digital sound mixer and recorder, along with seven radio microphones including two Wisycom dual systems. Combined with two of my own microphones, this gave us the nine radio mics we needed for all participants. Pietro set up his sound mixer and workstation just behind my camera positions in the stalls and fitted radio microphones to each panellist and actor as they arrived.
Two camera filming
Both cameras sat on tripods in the middle of the stalls, with enough space in front for the invited audience. Before filming began, I asked the actors to wait for my cue before starting each scene. This gave me time to reframe the cameras between each performance. The short pauses this created worked well in practice, and I later removed them during the edit. The production team had prepared the running order thoroughly, and the debate and recording went very smoothly as a result.
Managing sound files and video editing
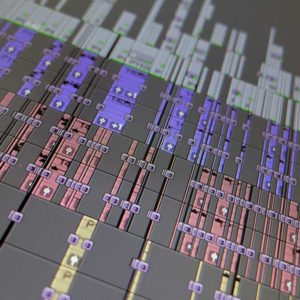
After the debate, Pietro supplied me with polyphonic .wav sound files for the edit. Once I imported these into Avid Media Composer, each file opened to display the separately recorded audio tracks for every contributor. I first copied all media onto two Promise Pegasus 12TB RAID drive sets, one as the main working drive and one as a mirrored backup.
From that material I edited a full-length 67-minute version of the panel discussion and a 60-second trailer. Shooting in 4K gave me considerable flexibility to resize and reframe shots during the edit, even though the final delivery format was HD at 1920×1080 resolution. This is one of the key practical advantages of filming a panel discussion in 4K when delivering in HD.
Summary: key steps for filming a panel discussion
To summarise the approach covered in this article:
- Use two cameras as a minimum to give yourself editing flexibility.
- Hire a dedicated sound recordist for multi-person panel discussions.
- Fit each contributor with their own radio microphone.
- Discuss lighting requirements with the venue in advance.
- Agree the running order and cue system with performers before filming.
- Back up all media immediately after the shoot onto at least two drives.
- Shoot in at least 4K where possible to give yourself reframing options in the edit.
Managing the sound files and video editing
After the debate had finished, Pietro gave me a copy of his polyphonic (.wav) sound files for the edit. Once imported into Avid. This polyphonic file opens up to display each of the separately recorded audio tracks. I first copied all the media onto my 2 x Promise Pegasus 12TB RAID drive sets (one main working set and one mirrored back-up set). I then edited a full-length 67-minute version of the panel debate and also a 60-second trailer. Using 4K video footage gave me a lot of flexibility to resize shots, making the editing work very well, as I was delivering video at HD 1920 x 1080 resolution.
Both the 67-minute version and the 60-second trailer edited from this shoot can be watched on my YouTube channel.
If you would like my help with filming a panel discussion and sound recording, please get in touch via my website contact form.
You might like to check out some of these other helpful articles or advice and tips in my videography blog.
Product training video production