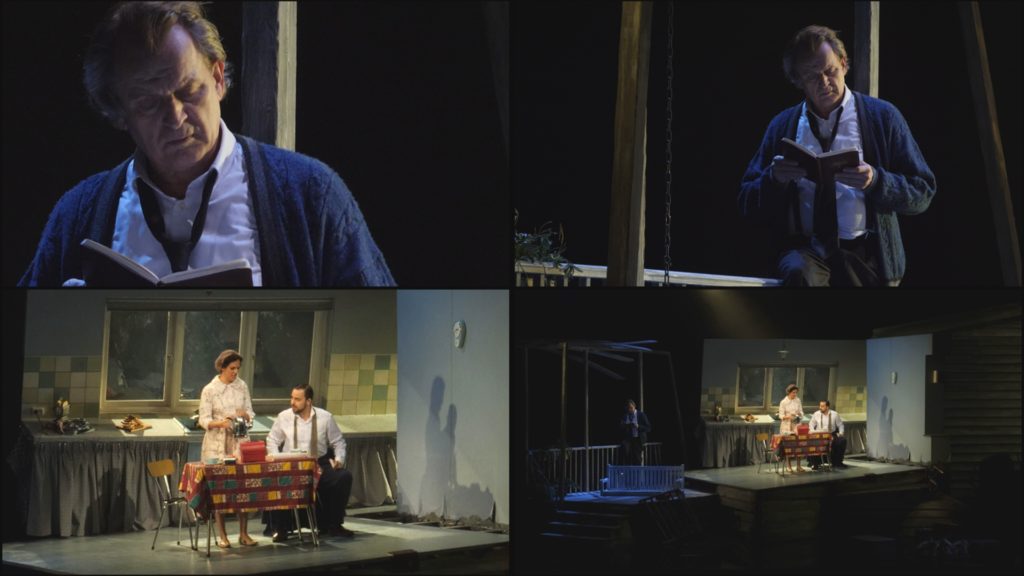
As a freelance videographer, I have produced, filmed and edited a wide variety of multi-camera filming projects. These have included operas, theatrical plays and (my recent project) a series of 2-hour musicals filmed with 6 UHD cameras. Having built up a wide breadth of knowledge of multi-camera filming’s intricacies, I here share some useful tips and advice for you to consider should you be embarking on a multi-camera filming project for the first time. These tips are based on my experience working as a solo cameraman in producing and filming such multi-camera productions.
Multi-camera production
When commissioned for a multi-camera production, it is important to understand exactly what you are responsible for delivering. Obviously, there are many elements to manage when filming live performances with multiple cameras by yourself. On previous multi-camera gigs, I have ensured that specific production staff manage and deliver the final quality soundtrack, which has enabled me to concentrate solely on the visuals. When this has not been possible for some gigs, I have also recorded the ‘as live’ sound. Whatever type of production you are working on, ensure that defined parameters are agreed upon with the director ahead of the booking confirmation, and any support you require will be provided to deliver the final project.
Location recce
Visit the filming location as soon as you can to ascertain what spots could work best to locate your positions for all your cameras, camera tripods and where you could potentially safely and securely mount any camera support brackets. Each venue and ‘on the night’ environment will present many different challenges. By scoping out the location early and considering what options you have, you can make the best-informed decisions and subsequent recommendations to agree with your production team. Meeting with venue staff and the production technical crew allows you to share ideas and resolve potential problems early in the production process. For example, you may need to request some adjustments to the audience seating or additional structural supports for your preferred camera positions.
Planning
With an understanding of the production brief, budget and location, you can then plan what camera set-up to install and what additional kit you may need to obtain to ensure the most successful outcome. By planning well ahead, you will have time to consider many possible eventualities and options. It is important to communicate with your production team about your preferred positioning for the cameras to ensure that works with their own requirements for the production, the cast and the location when considering the environment and any potential audiences. You may need to offer workflow and technical guidance to your production team and any on-location crew if they are new to the experience of filming live productions.
Visual consistency
Ideally, all the different camera recordings have a similar or matching aesthetic. You may prefer to use all the same make and model of cameras with visually consistent lenses if possible. I find it very helpful to ensure each camera I use for a multi-camera production can give the same visual look. This may mean filming with all the cameras set at the same codec and resolution. Filming with a ‘LOG’ high dynamic range picture profile will give you much more flexibility in post-production when it comes to colour grading the pictures. When filming with a LOG profile, setting the same measured Kelvin temperature on each camera and ensuring the cameras exposure settings all match will give the same consistent results.
Multi-camera exposure
With many of the theatrical productions that I have filmed, I have needed to set the exposure settings to allow for a very wide range of light conditions (for example, from very dark to brightest). One way of managing this is to ascertain the hottest, whitest or brightest point of the production. To do this, you need to factor in the set-design, cast clothing, props and lighting. Once you have identified this moment, you can ask your production to re-create it so that you can then calculate the exposure settings based on that point. The great advantage of filming in LOG or a similar is that it ensures the maximum colour information is recorded. This will give you a much greater range of adjustment in post-production and also ensures that you don’t end up with burnt-out whites, for example. In setting your cameras exposure settings, you will also need to consider how sensitive your cameras are too low light levels. I have previously filmed in manual exposure, which ensures my frame rate and aperture remain fixed, and I then set the Auto ISO range for each camera to then adjust what best suits the different light levels.
Setting-up time
The more cameras you are filming with, the more time you should allow for setting up everything into position ahead of the production. I personally prefer to bring my kit together the night before any gig. I clean all my lenses, check my camera sensors, wipe and format all my camera data cards and ensure all the camera settings are all the same. Also, bringing together all my camera supports and tripods that might be required as well as any other support equipment. Other things to consider will be camera power and possible battery requirements back up. Ensuring everything is running off mains power will give you one less thing to worry about.
Managing media requirements
Calculate how much media you will need for your recording and how you will manage that. If you are recording onto camera data cards, make sure they are sufficiently large to record the whole performance. If you are also editing the production, you will need to ensure you have enough hard drive space to copy off any filmed media and any subsequent transcodes while ensuring it is fully protected on a separate back-up drive.
Camera data cards
Multi-camera filming gives less time to manage the operation and monitor each camera. It’s sometimes helpful and realistic to keep all the locked-off setup cameras rolling even between short breaks in a performance. To allow for this constant filming (especially when filming in 4K), I now use much larger SD data cards for each camera. Also, by filming with two SD data card slots in each camera, I can ensure that each camera records for as long as required. In this case, it is advisable to use the most reliable, highest quality and fastest data cards. Personally, I’ve always used SanDisk SD cards during my multi-camera filming, and they have never let me down.
Film a rehearsal
If you have the option of setting up all the cameras and filming a dress rehearsal, take advantage of this benefit as it will help test your workflow and ensure everything is working according to plan before the actual main performance. Filming the rehearsal also enables you to review your filmed footage, camera settings and camera angles to ascertain if any improvements can be made before filming the designated performance. Once you have watched the filmed rehearsal performance, you might want to change a camera position or use a different lens to capture a better angle of performance, for example.
Lighting and set changes
After watching the filmed rehearsal performance, you may wish to make some recommendations to the production and technical team to help improve the filming of the final live production. For example, in previous productions, I have suggested lighting changes to avoid very darkly lit sets and adjustments to cast positions to avoid the blocking of cameras. Viewing the rehearsal footage has also enabled me to see the range of cast movement and suitably adjust my camera positions and lenses used.
Filming notes
After filming a rehearsal, it may help you to watch the performance through and compile a list of short filming notes. These may help you ensure any filming with a longer lens capturing closer shots can also follow the action should you be less familiar with the whole production’s progress. Your shots guidance list can be placed close to any moving camera position as an aide memoir during the main filming session.
Recording sound
It’s essential to ensure that any sound recording is recorded at the same frame rate as your video recording. For example, if you record the video at 25 frames per second (FPS), then ensure that the sound recording is being recorded at the same or a compatible setting. For very long recordings, some ‘drift’ might occur on different recording devices. Ensuring any sound recording records the opening and end clapper boards will help you easily check the sound recording matches the video recording.
Syncing sound
To ensure the sound and vision can all be synced up accurately in post-production, I usually use a clapper board to ensure a visual and sound reference for each camera. At the end of the performance, I also do an end clap so that you can quickly check if there has been any ‘drift’ and ensure everything is completely in sync in the edit. Depending on the camera angles, you may need to do additional claps if one clap will not suffice for being captured in vision across all cameras. If you can sync the timecode of all of your cameras, this will also help you sync all the different angles in post-production. Remember, if you have a long break in the performance, you may need to have an end clap before you stop the cameras and then another clap after you restart them all.
Camera codecs
Consider which camera codec and which quality setting to record with. Ask yourself what is required of the media after filming. Will you be managing the post-production yourself, or will someone else’s workflow and post-production system need to be considered? An overview of the production and post-production process will help you ensure that you deliver the highest quality, most suitable and most compatible media for any given project.
Backing up camera media
Filming with multiple-cameras also means you will need to manage much more data carefully. It’s always a great idea to back up any recording immediately onto hard drives using a laptop. Organising your camera media into separate camera folders can also help prevent any confusion when a great deal may be happening around you at the same time. Creating one or more clones of that hard drive data is the safest way to secure your data. Always make sure you have a checked copy and clone before you clear down your camera data cards.
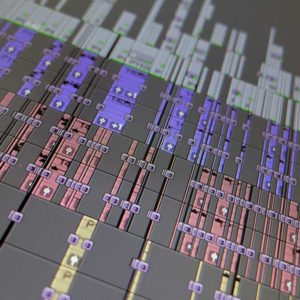
Multi-camera post-production
Filming with two or three additional cameras means managing two or three times as much data, so having enough media storage becomes an important issue. If your camera media needs transcoding, or any other workflow before editing, this will also add significant extra post-production time. You then have the fun of editing all your amazing footage with multi-camera editing and then delivering a whole beautiful production that you’ve produced, filmed and edited all on your own!
Multi-camera filming
Multi-camera filming is a great way to add value to any high-quality production. Modern smaller lighter cameras are an excellent solution for multi-camera filming of theatrical and operatic performances, live gigs, music promos and one-off events.
I hope these above points help give some insight and help those considering multi-camera productions for the first time.
You might like to read some of my other blog posts: